3 min to read
Frida Quick Setup (Android)
A minimal Frida setup on Linux and Android for pentesting.
Because I absolutely hate Static Analysis (a.k.a. reading source code), hooking application functions is my preferred ninja way. That’s why in Mobile Pentesting (whether on Android or iOS), Frida is one tool we simply can’t avoid.
With hooking techniques, we can manipulate the application’s execution flow while it’s running. In short, when an application detects that a device is rooted, we can “lie” to the app and say, “Nope, this device is not rooted!” by forcing the function to return False.
For that reason, if we want to perform effective hooking, Frida is not just helpful, it’s absolutely essential.
Installation
Since Frida uses a client-server architecture, like the Frida Client sends commands from the host machine (PC or laptop) to the Frida Server running on the Android Device. Because of this setup, we need to configure Frida on both sides.
Note: The Android device must be rooted.
1. Setup Frida Server (Android)
We can download the Frida Server from the following URL https://github.com/frida/frida/releases/latest
When downloading, make sure the file name starts with frida-server-xxx, and that the architecture matches the device we are using. To check the device architecture, we can use the following command.
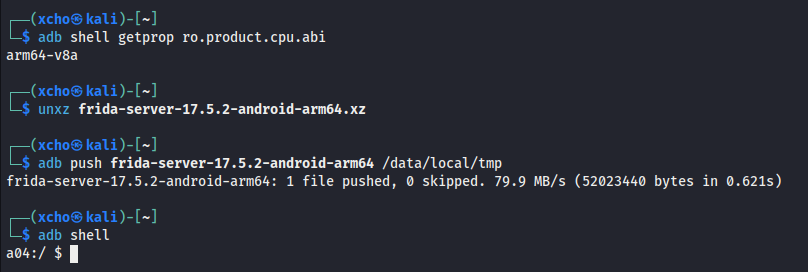
adb shell getprop ro.product.cpu.abi
After identifying the device architecture (for example, arm64), the Frida Server we need to download is frida-server-xxx-android-arm64.xz.
Setup
Once that’s done, extract the file and copy (push) it from the host machine to the Android device using the adb push command. After that, enter the device shell using adb shell.
unxz frida-server-17.5.2-android-arm64.xz
adb push frida-server-17.5.2-android-arm64 /data/local/tmp
adb shell
After entering the Android shell, we just need to grant execute permission (+x) to the frida-server file. Next, move the file from /data/local/tmp to /data/local. However, to perform all of these steps, we need root privileges. That’s why we must run the su command first.
su
chmod +x /data/local/tmp/frida-server-17.5.2-android-arm64
mv /data/local/tmp/frida-server-17.5.2-android-arm64 /data/local/
Once everything is set, run the frida-server and make sure no errors appear when it starts.
/data/local/frida-server-17.5.2-android-arm64 -D

2. Setup Frida (Linux/PC)
For installing frida-tools here (or other Python-based tools), I personally prefer using a virtual environment. This way, I can keep each project’s environment isolated and avoid conflicts between libraries during installation.
Note: The Frida tools are required to use the same version as the Frida Server.
python3 -m venv frida
source frida/bin/activate
python3 -m pip install frida-tools frida==17.5.2

Verify
Once both sides are installed, we need to make sure everything is working properly by running the following command.
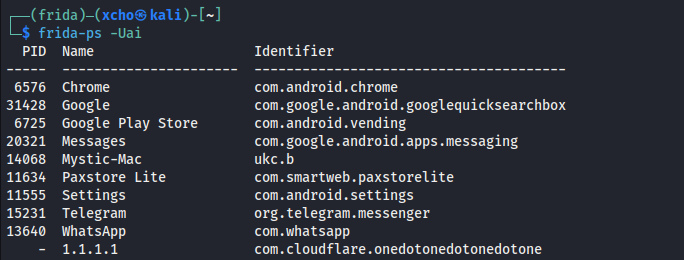
frida-ps -Uai
If the command outputs a list of applications along with their process IDs, it means the installation was successful.
Common Errors
Android Runtime (ART) vs Frida-Server
Frida Server on Android often doesn’t play nicely with ART, so when it runs, various errors can sometimes appear. The first thing I usually do is uninstall ART.
adb shell
su
pm uninstall com.google.android.art
reboot

Comments