2 min to read
Burp Suite Certificate Setup for Android 13 and Below
Step-by-Step Guide to Enabling SSL Interception on Android 13 and earlier.

If Android doesn’t have the Burp Suite certificate installed at the system level, all HTTPS traffic will be outright blocked. Think of it like Android refusing to communicate with Burp Suite until it’s given an official “ID badge.” That’s exactly what this certificate does.
And of course, this is one of the mandatory prerequisites we need to set up before getting into Android application pentesting.
Alright, enough talking, let’s get started.
To follow along and simply copy-paste the commands, make sure you have:
- Your Android version is 13 or lower
- An Android device connected via ADB
- Burp Suite up and running
Prep the Certificate
First, we need to make sure that Burp Suite is running and accessible through the browser.
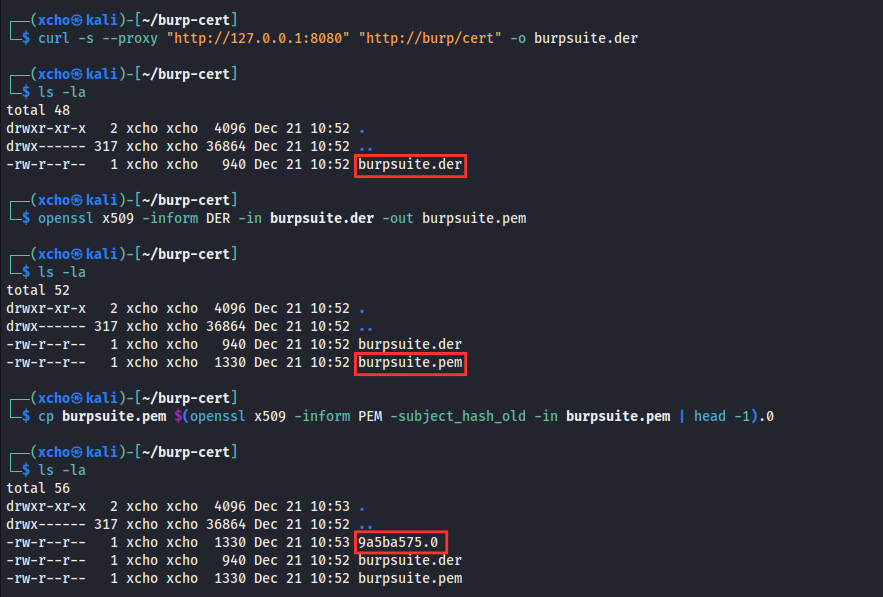
Once that’s set up, we need to download the certificate directly via the Burp Suite proxy to get the certificate file in DER format. After that, we’ll convert it to PEM format for compatibility. And then, we’ll rename the certificate file based on its subject hash so it can be properly recognized once it’s installed on an Android system.
curl -s --proxy "http://127.0.0.1:8080" "http://burp/cert" -o burpsuite.der
openssl x509 -inform DER -in burpsuite.der -out burpsuite.pem
cp burpsuite.pem $(openssl x509 -inform PEM -subject_hash_old -in burpsuite.pem | head -1).0
Configure
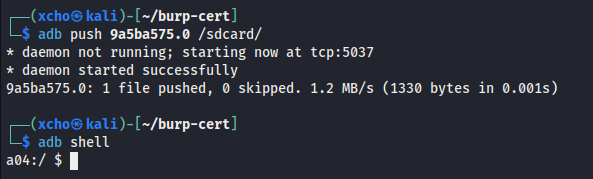
Once the Burp Suite certificate has been prepared and converted, the next step is to push it into a writable directory on the Android device.
adb push 9a5ba575.0 /sdcard/
adb shell
Configure (Normal Step)
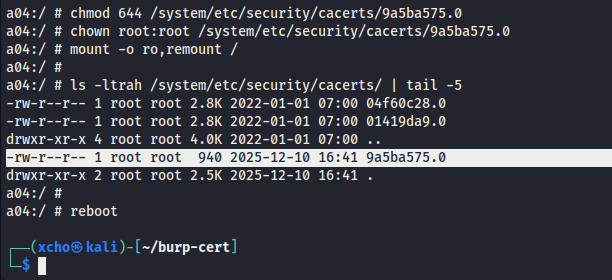
Next, we move the certificate into the system certificates directory. Because / (root) is immutable by default, it must be remounted as writable before we can proceed.
su
mount -o rw,remount /
mv /sdcard/9a5ba575.0 /system/etc/security/cacerts/

After that, we adjust the certificate file’s permissions and ownership to ensure compatibility with the Android system. After that, we remount the root (/) filesystem back to read-only and reboot the device.
chmod 644 /system/etc/security/cacerts/9a5ba575.0
chown root:root /system/etc/security/cacerts/9a5ba575.0
mount -o ro,remount /
reboot
Verify
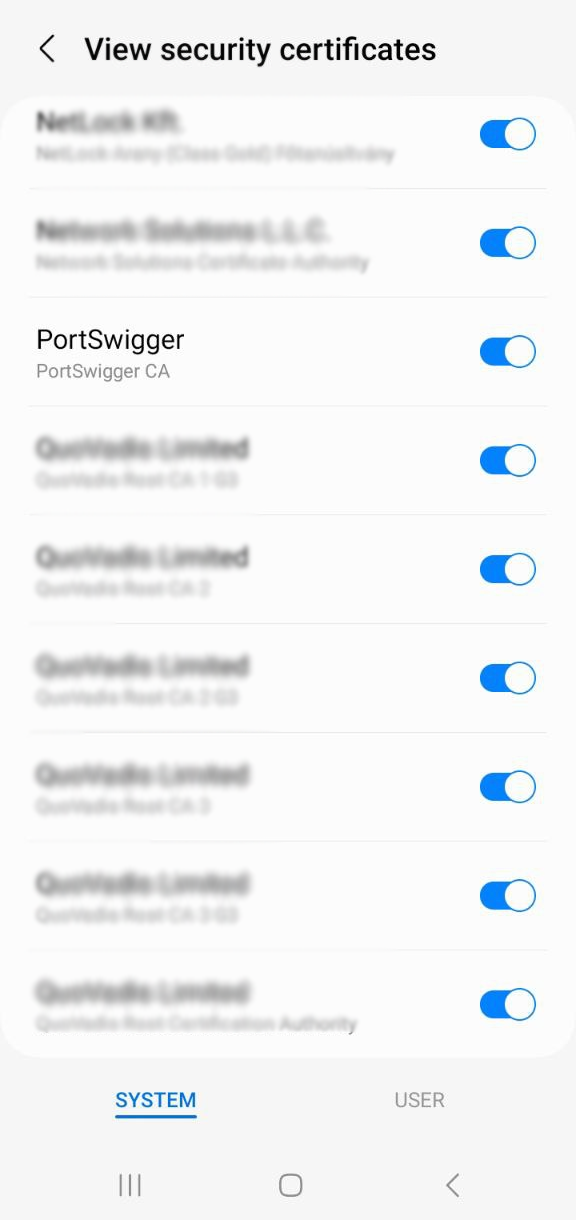
With these steps completed, the Burp Suite certificate is now installed as a system certificate, allowing the Android device to trust intercepted HTTPS traffic during testing. But, this does not bypass SSL Pinning if it is enforced by the application.
For verification, simply check the Android device. If the PortSwigger certificate is listed under system certificates, the setup has been completed successfully.


Comments